



 Everyday Floor Cleaning Starter Kit · $149.00
 Everyday Floor Cleaner Concentrate · $49.00
 Everyday Spray Mop · $94.00
 Replacement Mop Heads · $19.00

How to Clean and Fix Scratches on Wooden Floors
Sep 23, 2026
We've all been there. You're tidying up the living room when you suddenly notice them: those frustrating scratches running across your beautiful wooden floors. Whether it's from moving furniture, pet claws, or just everyday foot traffic, scratches on wood floors can make your entire home look tired and worn out.
The good news? You don't need to hire an expensive professional or replace your flooring to get things looking good again. Learning how to clean wooden floor scratches is actually much simpler than most people think, and you can tackle most of them with basic supplies you probably already have at home.
In this guide, we're going to walk you through everything step by step. You'll learn how to properly clean scratched areas before treating them, identify what type of scratch you're dealing with, and apply the right fix for the job. We've kept things straightforward and beginner friendly, so no prior experience is needed. By the time you finish reading, your floors will be well on their way back to looking their very best.
First, Work Out What You're Actually Dealing With
Before you reach for any product or start Googling repair kits, take thirty seconds to actually figure out what you're dealing with. I've seen plenty of people (myself included, early on) go straight into fix-it mode only to make things worse. Trust me, a quick diagnosis upfront saves you time, money, and a whole lot of frustration.
Start with the fingernail test. Run your fingernail firmly across the scratch. If it glides straight over without catching, you're looking at a surface scratch sitting only in the finish layer, and the timber underneath is completely untouched. If your nail catches or dips into the groove, the damage has gone deeper into the wood itself. That one simple test tells you almost everything you need to know about how to proceed. According to this hardwood floor scratch repair guide from USA Pro Floors, around 80% of light scratches can be sorted with a basic touch-up, often in under 15 minutes.
Here's how the three categories break down:
Surface scratches sit only in the finish layer. The wood is fine. These are the most common type and entirely fixable at home.
Minor scratches have slightly penetrated the finish and nicked the timber. They need a bit more effort but are still very manageable.
Deep gouges expose raw wood fibre, sometimes with visible colour loss. These typically need wood filler or professional refinishing, and are genuinely beyond standard DIY territory.
Getting this diagnosis right before doing anything else really matters. Over-treating a surface scratch, like applying filler and sanding when it wasn't needed, can damage the surrounding finish and create a bigger problem than you started with. Under-treating a deeper scratch with just a wipe-down won't hold.
In Kiwi homes specifically, the usual suspects are pretty predictable. Gumboots worn inside, sand tracked in after a beach day, kids skidding around, pets with unclipped nails, and furniture dragged across timber floors without felt pads underneath. All of these create wear patterns, but most of what ends up on your floor day-to-day is finish-level damage only.
The reassuring news? The vast majority of scratches that have people worried are surface-level and completely fixable without calling anyone in.
Step 1: Clean the Floor Before You Do Anything Else
I know it's tempting to skip straight to the repair, but trust me on this one: cleaning first is non-negotiable. Here's why. Any grit, dust, or tiny debris sitting in or around that scratch will get ground deeper into the wood the moment you start buffing or working a repair product into the area. You're essentially turning a minor surface scratch into something worse. I've learned this the hard way, and it's a frustrating mistake to make when you were trying to fix the problem in the first place.
Start with a dry sweep before anything else. A quick vacuum or dry microfibre sweep removes the loose stuff before any liquid touches the floor. Then, when it comes to mopping, the rule is damp, not wet. Excess moisture is one of the fastest ways to damage a timber floor at the best of times, but around a scratch where the protective finish is already compromised, it's even riskier. Water can seep into that exposed area and cause the wood to swell or cup, turning a cosmetic issue into a structural one.
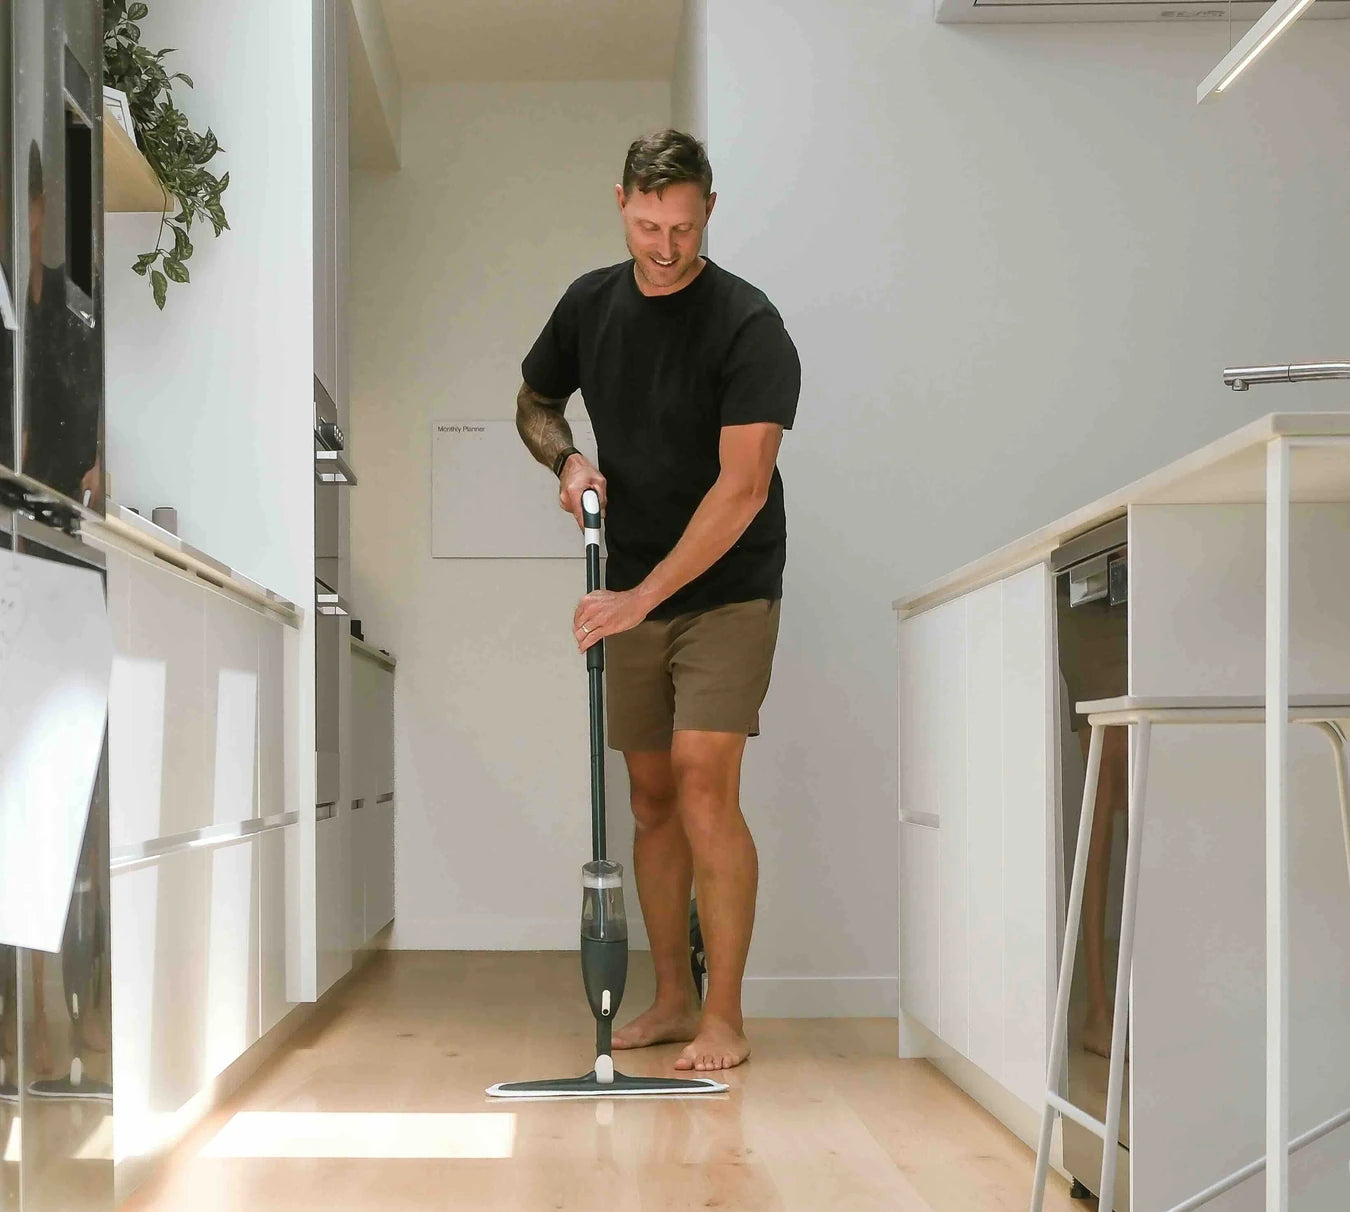
When choosing a cleaner, look for two things: a pH-neutral formula (roughly pH 6 to 8 is the safe range for finished wood) and a concentrated formula that dilutes down. A concentrated cleaner means you're controlling exactly how much liquid goes onto the floor, rather than sloshing a premixed solution around. This is where the Abstract Floor Care spray mop and concentrated cleaner approach works really well. The spray-and-mop system delivers a fine controlled mist directly where you need it, rather than a wet pour from a bucket. That level of control matters a lot on a scratched floor.
Once you've cleaned the area, dry it thoroughly before moving on. A dry microfibre cloth speeds things up, but give it at least 15 to 30 minutes of air dry time regardless. Any residual moisture sitting under a repair product will cause it to lift, bubble, or simply not bond properly. You'd be doing the repair twice, which nobody has time for.
Step 2: Fixing Surface Scratches (The Most Common Kind)
Now that your floor is clean and dry, it's time to actually tackle those scratches. The good news? Most of the marks people stress about fall into this category, and they're very manageable at home.
Start With Just a Microfibre Cloth
Before you buy anything, try this first. Take a clean, dry microfibre cloth and buff the scratched area using small circular motions with a bit of pressure. For very light surface marks, this alone can reduce visibility surprisingly well. What you're doing is redistributing the existing floor finish across the damaged area, essentially smoothing it back out. It takes about two minutes and costs nothing. Give it a try before spending a cent.
When Buffing Isn't Enough: Concealment Products
If the scratch is still visible after buffing, wood-toned markers and wax fill sticks are your next step. These are widely available at hardware stores and do a solid job on surface scratches. The key is to match your floor colour as closely as possible and build up in thin layers rather than globbing it on. Apply a little, buff it in, assess it, then add more if needed. Over-applying is the most common mistake and it makes the repair look worse, not better.
One important tip: always test in a low-visibility spot first, like inside a wardrobe or behind a door. This matters even more if you have NZ native timber floors. Rimu and matai have distinctive warm, reddish tones that don't match standard "light oak" or "dark walnut" repair kit shades. Testing first saves a lot of headaches.
Finishing the Job With a Floor Polish
Once you've concealed the scratch, applying a thin coat of floor polish or finish restorer over the area helps blend everything into the surrounding floor. This works particularly well on polyurethane-finished floors, which is common in most NZ homes. Use a small amount, buff it in lightly, and let it dry completely before walking on it.
One honest note to finish on: surface scratch repair reduces visibility significantly, but it rarely makes a scratch completely invisible under every lighting condition. Raking afternoon light has a way of showing things that overhead lighting hides. That's completely normal and okay. The goal here is improvement, not perfection, and for most everyday scratches you'll get a result that genuinely looks great.
Step 3: Deeper Scratches and When to Call It
So you've run your fingernail across the scratch and it catches. That puts you in different territory from the surface stuff we covered in Step 2, but it doesn't mean you're in crisis mode either.
Wax Sticks and Wood Filler for Moderate Scratches
For scratches that catch the nail but haven't gouged out actual wood fibre, a wax filler stick is your first move. Press it firmly into the groove, smooth it flush with a plastic scraper or an old credit card, then buff lightly with a soft cloth. The results are genuinely decent in normal light. Just be honest with yourself: under raking light (that low-angle afternoon sun that hits your floor like a spotlight), the repair will still be visible. It's an improvement, not an invisibility trick.
When It's a Proper Gouge
Deep gouges that have actually displaced wood need matched wood filler, not wax. You apply it, let it dry fully, sand it back flush, and potentially spot-refinish to blend the sheen. This is where the margin for error gets real. An uneven sand or a slightly-off finish can look more obvious than the original damage.
This is also the point where calling a professional starts making financial sense, especially if the gouge is in a hallway or open-plan living area where it's seen every day under changing light. Professional restorers have colour-matching and tinting tools that simply aren't practical for a one-off home repair.
Native NZ Timbers Are a Special Case
If you've got rimu, matai, or kauri floors, colour-matching becomes genuinely difficult without professional knowledge. These timbers have warm amber and red tones with pronounced grain variation, and most off-the-shelf fillers are formulated for European oak or pine. They often read as flat and obviously wrong against aged native floors. For these species in visible areas, a professional restorer isn't an extravagance; it's the right call.
The bigger picture though? A few scratches are a sign of a home that's actually being lived in. For most NZ homes, the majority of floor damage sits in the surface and moderate categories, and those can be meaningfully improved with simple, low-cost methods long before a professional ever needs to be involved.
Your Floor Type Changes Everything
Here's the thing that most generic scratch-repair guides completely skip over: not all floors behave the same way, and using the wrong approach for your floor type can make things noticeably worse. Before you commit to any repair method, it's worth knowing exactly what you're working with.
Engineered Timber
Engineered boards have a real timber veneer on top, bonded to a structural core. Surface scratches can be treated the same way as solid wood, using wax fill, a touch-up marker, or light buffing. But here's the catch: that veneer is thin. Some boards have as little as 2mm of wear layer, which means aggressive sanding is off the table, or at best a one-time option across the entire life of the floor. Treat engineered timber conservatively. Start with the gentlest fix that works and stop there.
Solid Native NZ Timber
Rimu, matai, kauri, tōtara. These floors are genuinely beautiful and generally more forgiving of sanding and refinishing than engineered boards. The challenge is colour and grain matching. These native species have distinctive, rich tones and patterns that make a poorly matched filler stick out badly. Take your time sourcing the right touch-up product, or test any filler in an out-of-sight spot first.
Laminate Flooring
This is where most scratch advice completely falls apart. Laminate has a photographic print layer beneath a wear layer. You cannot sand it. You cannot refinish it. Your realistic options are a specialist wax fill kit, a matching repair marker, or replacing the affected board entirely. Manage expectations here.
Vinyl Plank (LVP)
LVP is increasingly popular in NZ homes because it handles moisture well and wears tough. Scratches tend to be surface-level thanks to the wear layer, so the wax fill or marker approach works well. Just avoid anything solvent-based, as it can cloud or lift the surface of the vinyl.
Sealed Concrete and Tiles
Worth a quick mention for households with mixed hard flooring. Tiles tend to chip rather than scratch, and sealed concrete is reasonably forgiving. The good news is that the same pH-neutral, floor-safe cleaner that looks after your timber floors works across all of these surfaces too.
What Not to Put on a Scratched Wood Floor
Here's where a lot of well-meaning DIY attempts go sideways. Getting the cleaning step right matters, but getting the product choice wrong on a scratched floor can genuinely make things worse. The finish around a scratch is already compromised, which means whatever you apply has a more direct path to the wood itself.
Harsh cleaners with bleach, ammonia, or strong degreasers are an obvious one to avoid, but the sneaky part is how many everyday household sprays fall into this category. Bathroom cleaners, kitchen degreasers, multipurpose sprays, these are all formulated to cut through grease and grime aggressively. On a scratched floor, that aggression strips away the surrounding finish, widening the visual impact of the scratch and leaving bare wood exposed to staining and moisture.
Steam mops are another one I'd keep well away from a scratched floor. The combination of heat and pressurised moisture is already considered risky on intact floors. On a floor where the finish seal is already broken, that steam drives moisture directly into the wood fibre. Swelling, warping, and permanent finish lifting around the scratch are all real outcomes.
Vinegar and water is probably the most frustrating one on this list, because it's genuinely everywhere online as a "natural" floor cleaner. The problem is that vinegar is acidic. Over time it dulls and etches the protective finish on hardwood and engineered timber, making surface scratches more visible, not less.
Oil soaps seem gentle but leave a residue on polyurethane-finished floors that stops repair products and finish restorers from bonding properly. If you're planning to treat the scratch at all, this creates a real problem you'll have to fix first.
The right cleaner is pH-neutral, wood-safe, and applied with minimal moisture. That's exactly what the Abstract Floor Care concentrated cleaner is formulated to be, which is why it works safely across timber, engineered wood, laminate, vinyl plank, and tile without disturbing what's left of the finish.
How to Stop Scratches Building Up Again
Fixing scratches is satisfying, but stopping them from coming back is where you actually win. These five habits are low-effort, low-cost, and genuinely make a difference over months and years.
Felt pads under every furniture leg. This is the single biggest bang-for-buck change you can make in your home, full stop. Chairs, dining tables, bar stools, sofas. Every time one of those gets shifted even a centimetre without felt pads underneath, it drags across the floor surface and adds to a slow build-up of fine scratches that accumulate over months. You won't notice each individual mark, but six months later you'll wonder why the floor looks tired. Replace felt pads every six to twelve months too, because they collect grit over time and can actually become part of the problem. We stock felt pad accessories at Abstract Floor Care that are designed to fit standard furniture legs, so it's an easy fix.
Gumboots off at the door. In New Zealand, sand and grit tracked in from outside is a leading cause of surface scratches. You don't need visibly muddy boots to bring in damage; fine particles from a gravel driveway or a beach walk are enough. A boot tray at the entry and a simple household rule makes a real difference, especially if you've got kids and a dog coming and going all day.
Sweep or vacuum before you mop. Grit sitting on the floor surface becomes an abrasive the moment a mop head or a foot pushes it across the finish. Twice a week is a reasonable rhythm for busy households. Use a soft brush attachment on the vacuum to avoid scratching the surface in the process.
Use a spray mop, not a string or sponge mop. Excess moisture softens timber finish over time, making the surface noticeably more vulnerable to scratching. A spray mop with a microfibre pad and a fine, controlled mist cleans the floor effectively without soaking it.
Mats in the high-wear zones. Hallways, in front of the kitchen bench, and at exterior door entries take the most punishment in any home. A mat in each of those spots is significantly cheaper than floor restoration.
When It's Time to Bring in a Professional
Sometimes the honest answer is that a floor has gone past what any DIY product or weekend effort can fix. Knowing when to make that call saves you time, money, and the frustration of working on something that genuinely needs professional attention.
Signs It's Beyond a DIY Fix
If you're looking at widespread deep scratching across most of the floor rather than a few isolated marks, gouges where the timber grain has actually lifted, or a floor that hasn't been refinished in ten-plus years, you're in professional territory. Visible structural issues like flex underfoot, soft spots, or damage that goes below the finish layer are also clear signals to stop and call someone.
What a Professional Can Actually Do
A qualified floor sander works through multiple sanding passes, going all the way back to bare timber before applying several coats of professional-grade finish. The result on a solid timber floor can genuinely look near-new, and for floors with decades of life still in them, the cost is absolutely worth it. If your home has native NZ timbers like rimu, matai, or kauri, ask specifically about experience with those species. They need careful handling, and not every operator has worked with them. Auckland floor sanding specialists are a good example of the kind of experienced local operator worth seeking out.
The Engineered and Laminate Reality
One important caveat: engineered timber and laminate floors generally cannot be fully sanded and refinished, by anyone. Engineered floors have a thin veneer layer, and laminate has a photographic wear layer that sanding simply destroys. A professional can tell you exactly what's possible for your specific floor, but for severe damage on these types, replacement is often the only real option.
Getting Quotes in NZ
Local floor sanding businesses in New Zealand typically price by the square metre. Get two or three quotes, ask whether they're familiar with your specific floor type, and check whether they offer a free on-site assessment before committing to anything.
The Short Version for Busy People
No time to read the whole thing? Here's the quick version.
Run your fingernail across the scratch. If it glides over without catching, you're dealing with a surface scratch in the finish, and that's very manageable at home. If your nail catches, it's gone deeper into the wood and needs more work.
Whatever you do, clean the floor properly before you attempt any repair. Grit sitting in a scratch acts like sandpaper and will make it worse. Use a pH-neutral, wood-safe cleaner with minimal moisture, not a bucket and mop soaked in whatever's under the sink.
Match your repair method to both the scratch depth and your floor type. What works on solid rimu will not work on laminate. These are genuinely different materials that respond differently.
Keep steam mops, vinegar, and harsh chemical cleaners well away from scratched timber floors. They damage the finish and make scratches more visible, not less.
For prevention: felt pads under furniture, a no-gumboots policy at the door, regular sweeping, and a consistent spray mop routine will dramatically slow down new scratch buildup.
If you want a cleaning system that's genuinely safe for wood floors and won't strip the finish you're trying to protect, the Abstract Floor Care spray mop and concentrated cleaner are a solid place to start.
Conclusion
Restoring your wooden floors doesn't have to be overwhelming or expensive. To recap the key takeaways: always clean the scratched area thoroughly before applying any treatment, identify whether you're dealing with a surface scratch or a deeper gouge, choose the right repair method for the job, and finish with a protective coat to prevent future damage.
The best part is that most of these fixes require minimal time, basic supplies, and zero professional experience. Your floors can look refreshed and beautiful again without breaking the bank.
Now it's time to put this knowledge to work. Grab your supplies, pick the worst scratch in the room, and start there. Once you see the difference a simple repair can make, you'll wonder why you waited so long. Your floors deserve a little love, and now you have exactly what it takes to give it to them.